Win10下安装MySQL
下载压缩包并解压
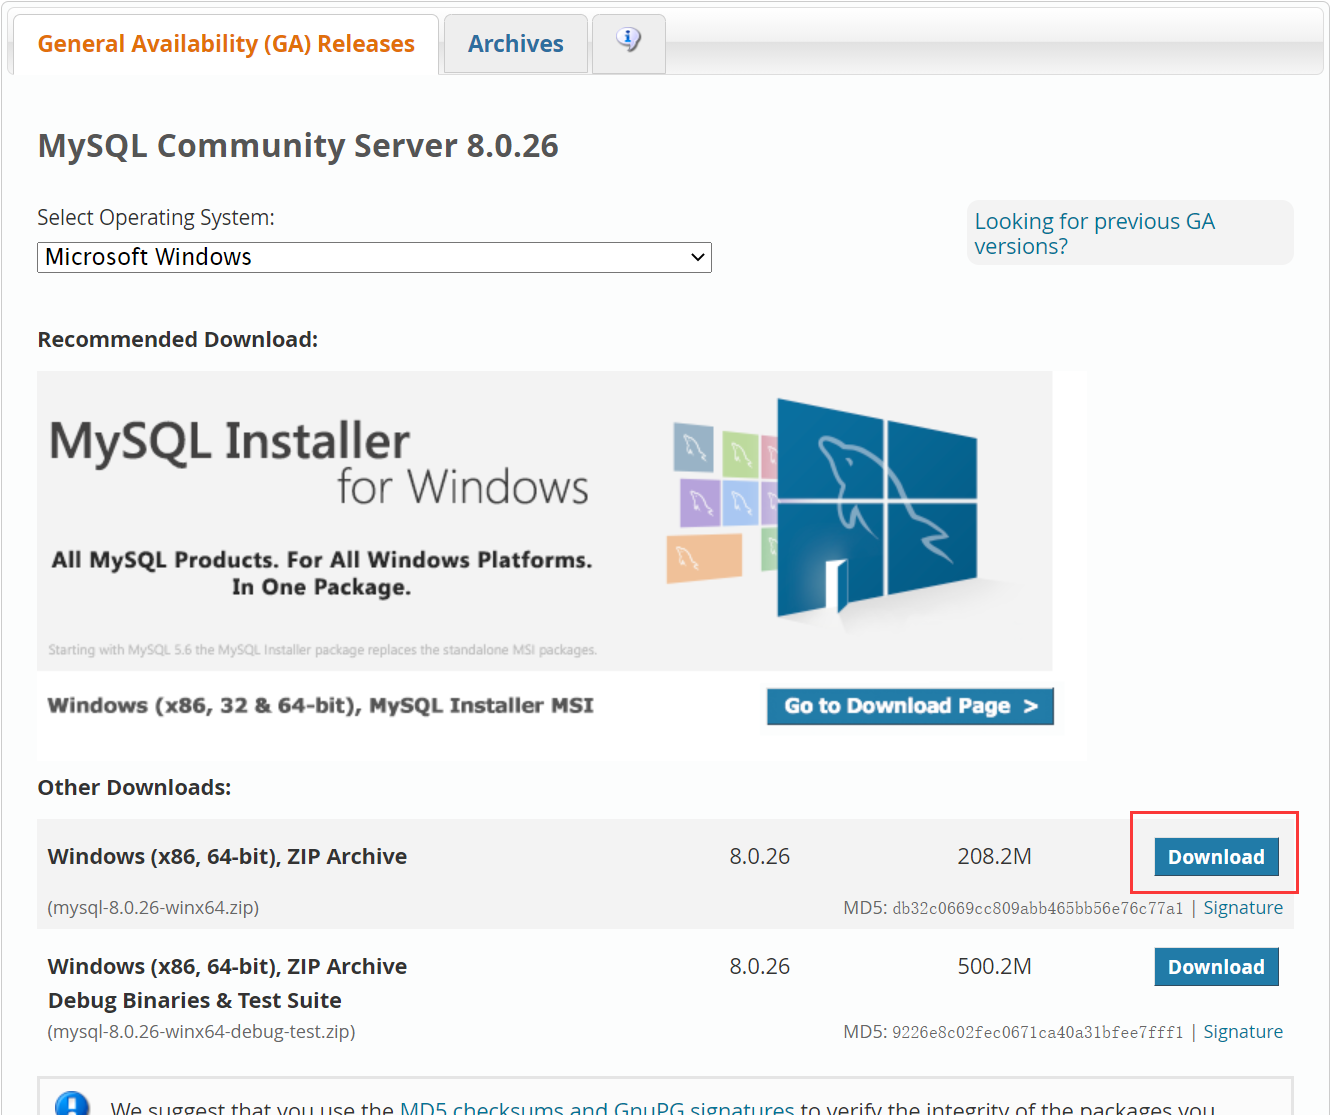
前往mysql官网下载压缩包

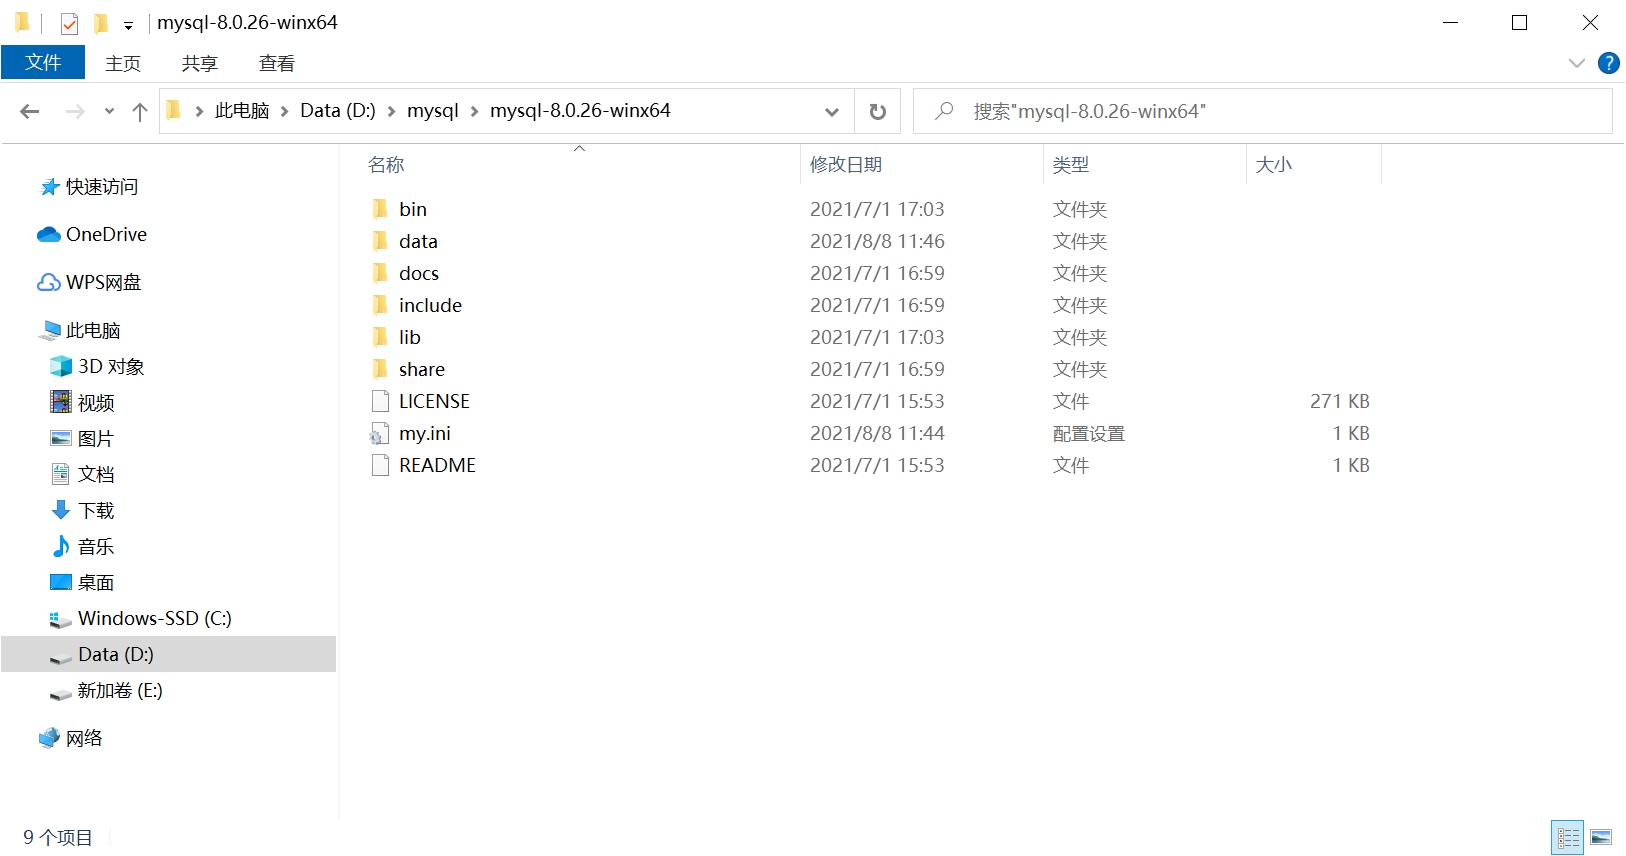
在D盘创建文件夹,命名为mysql,把下载的mysql-8.0.26-winx64.zip文件解压到D:/mysql目录中。

配置环境变量
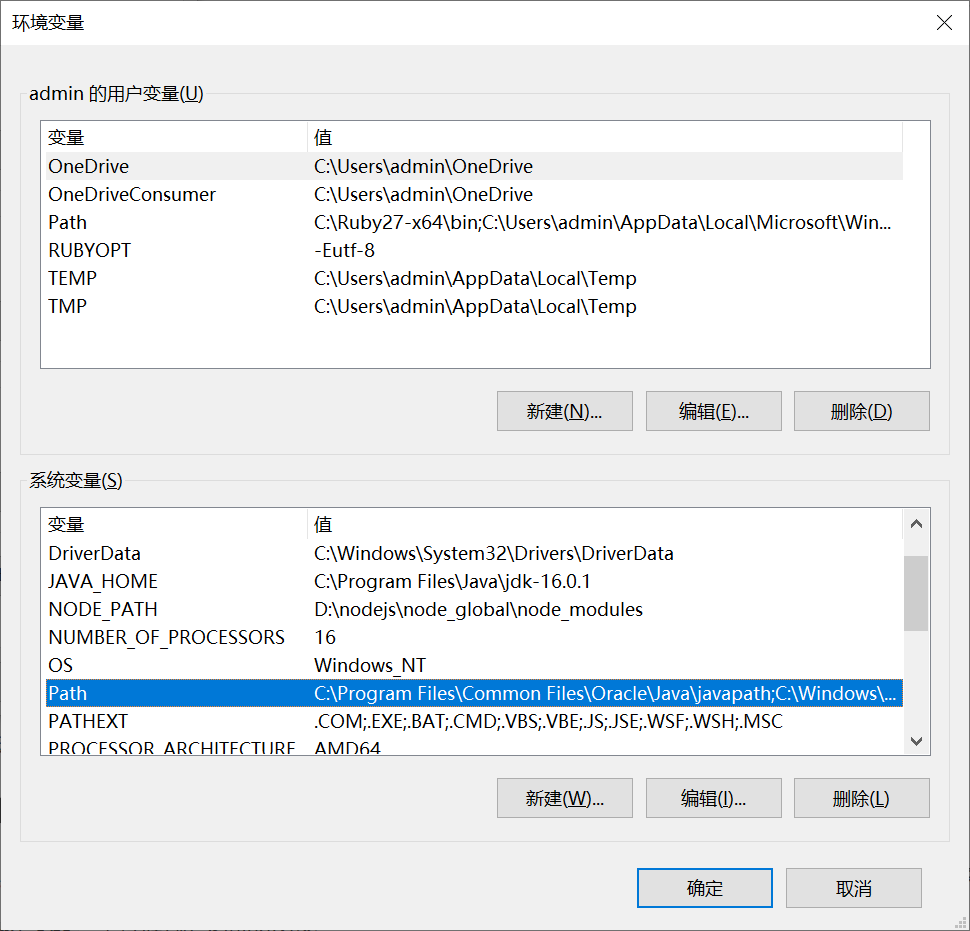
打开环境变量界面,找到系统变量里的path变量,点击“编辑”。

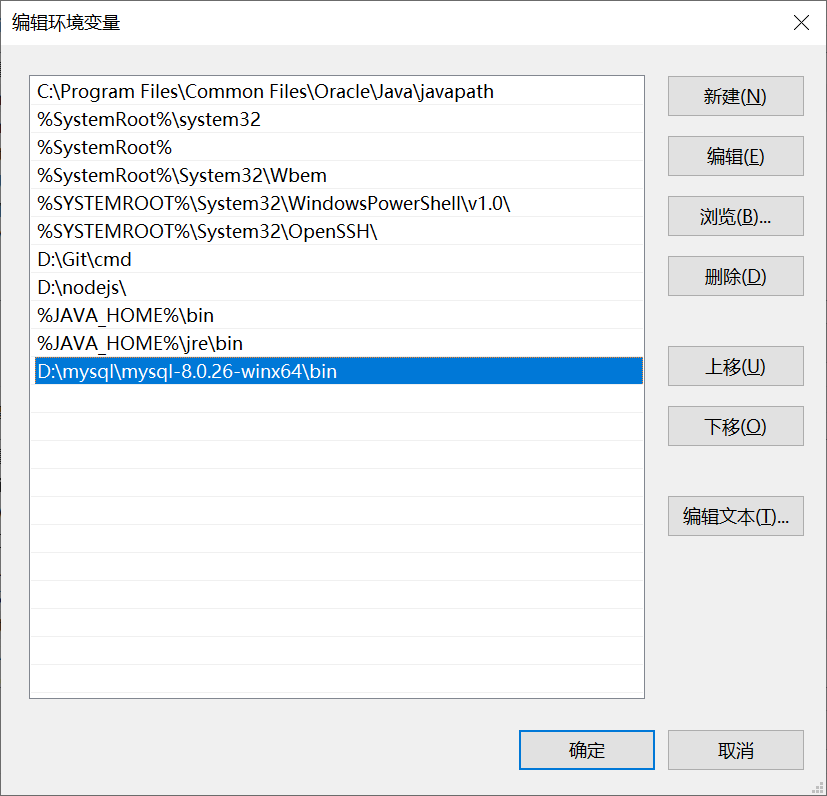
在最后加上D:\mysql\mysql-8.0.26-winx64\bin,也就是你的mysql解压后bin文件夹所在的路径。

添加配置文件(这个步骤貌似不需要)
在D:\mysql\mysql-8.0.26-winx64目录中,新建一个文件为my.ini,注意:是文件名称为my,类型为ini。
打开my.ini,复制粘贴下面的内容:
[mysqld]
#设置3306端口
port=3306
#设置mysql的安装目录
basedir=D:\mysql\mysql-8.0.26-winx64
#设置mysql数据库的数据的存放目录
datadir=D:\mysql\mysql-8.0.26-winx64\data
#允许最大连接数
max_connections=200
#允许连接失败的次数。这是为了防止有人从该主机试图攻击数据库系统
max_connect_errors=10
#服务端使用的字符集默认为UTF8
character-set-server=utf8
#创建新表时将使用的默认存储引擎
default-storage-engine=INNODB
#默认使用“mysql_native_password”插件认证
default_authentication_plugin=mysql_native_password

[mysql]
#设置mysql客户端默认字符集
default-character-set=utf8
[client]
#设置mysql客户端连接服务端时默认使用的端口
port=3306
default-character-set=utf8注意:第5行basedir=后面的值为 mysql-8.0.26-winx64文件所在的路径,第7行datadir=后面的值为 mysql-8.0.26-winx64文件所在的路径 + \data。
安装mysql
以管理员身份运行power shell或者命令提示符,依次执行下面的命令:
#第一步
mysqld --initialize-insecure --user=mysql
#第二步
mysqld -install看到Service successfully installed.则表示安装成功。
启动,登录mysql
- 执行
net start mysql命令启动mysql服务:
PS C:\Windows\system32> net start mysql
MySQL 服务正在启动 .
MySQL 服务已经启动成功。- 执行
mysql -u root -p命令登录mysql:
注意:Enter password:输入密码时直接回车即可
PS C:\Windows\system32> mysql -u root -p
Enter password:
Welcome to the MySQL monitor.  Commands end with ; or \g.
Your MySQL connection id is 8
Server version: 8.0.26 MySQL Community Server - GPL

Copyright (c) 2000, 2021, Oracle and/or its affiliates.

Oracle is a registered trademark of Oracle Corporation and/or its
affiliates. Other names may be trademarks of their respective
owners.

Type 'help;' or '\h' for help. Type '\c' to clear the current input statement.

mysql>- 执行
alter user user() identified by "你的密码";命令修改mysql的密码:
注意:mysql的所有命令都要以分号结尾。
mysql> alter user user() identified by "123456";
Query OK, 0 rows affected (0.01 sec)
相关命令
# 启动mysql服务
net start mysql
# 关闭mysql服务
net stop mysql